Required Admin App Setup
Introduction
In this article, we are going to set up the TYT Admin App’s initial setup for real-time use cases.
Required Setups
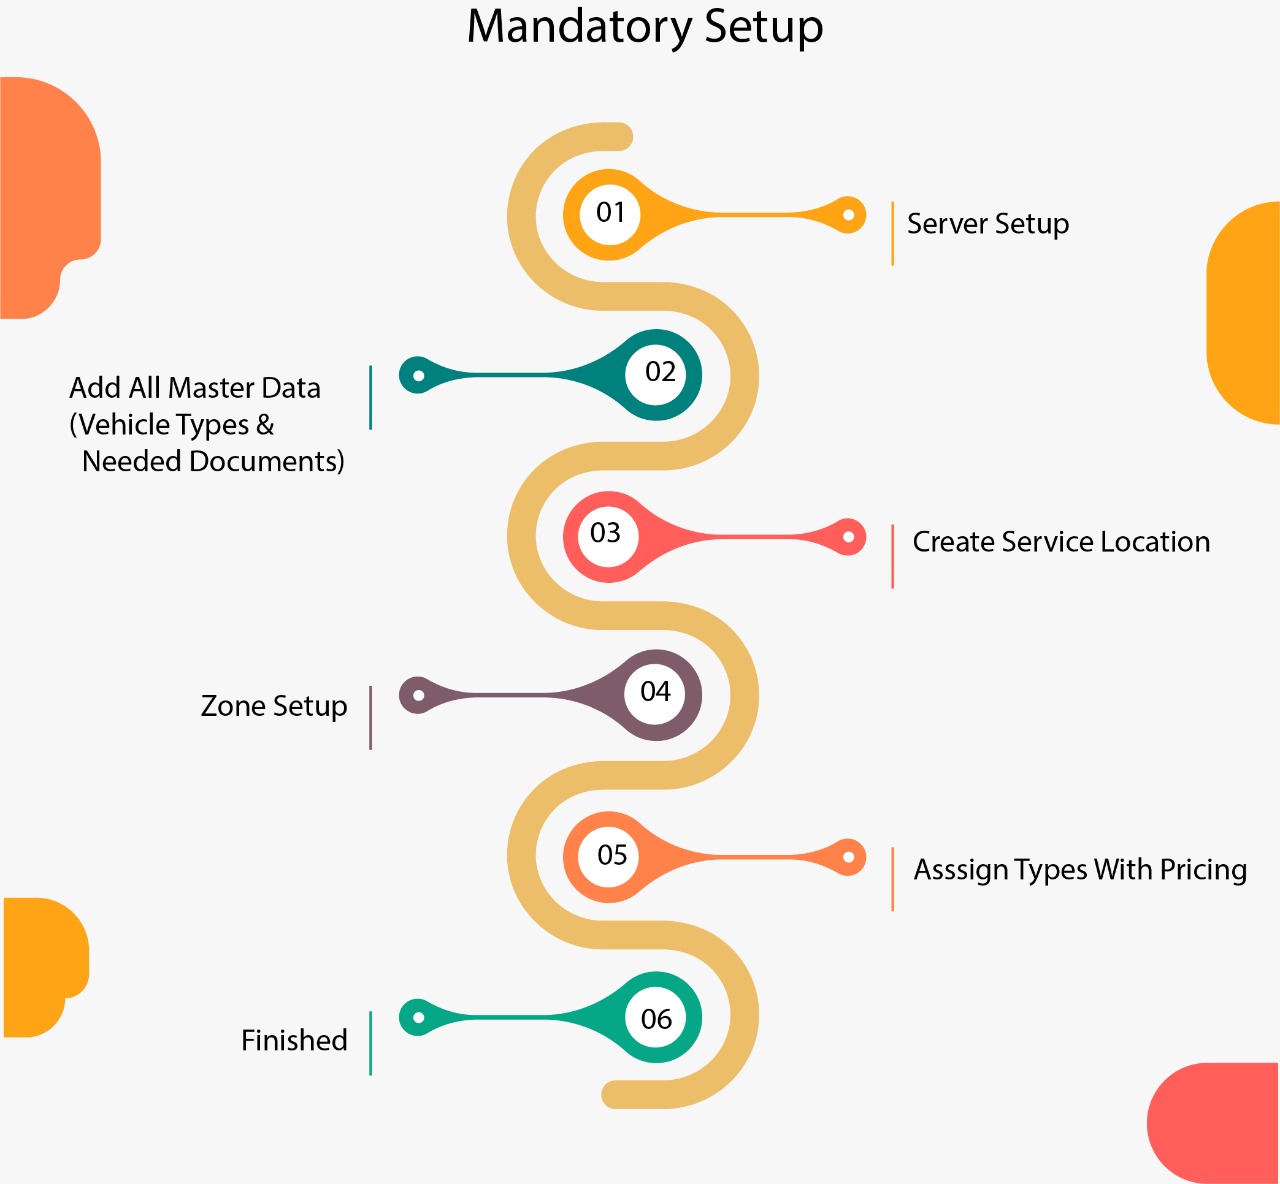
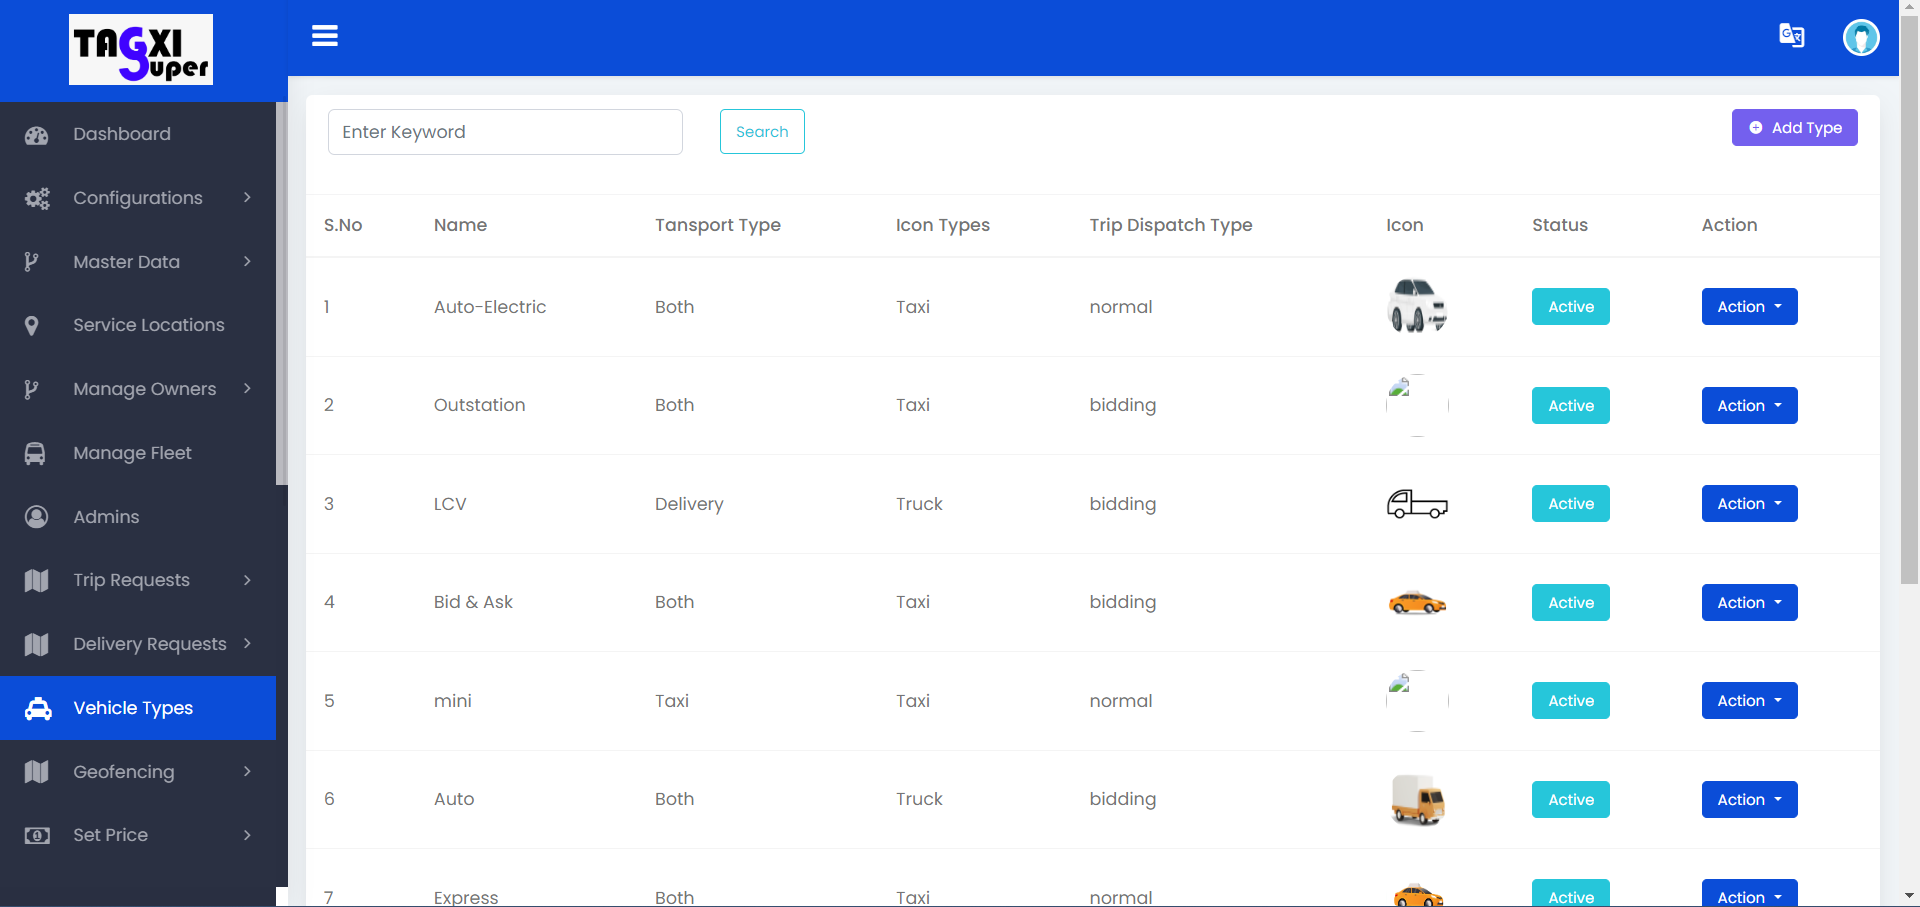
1.Add All Master Data
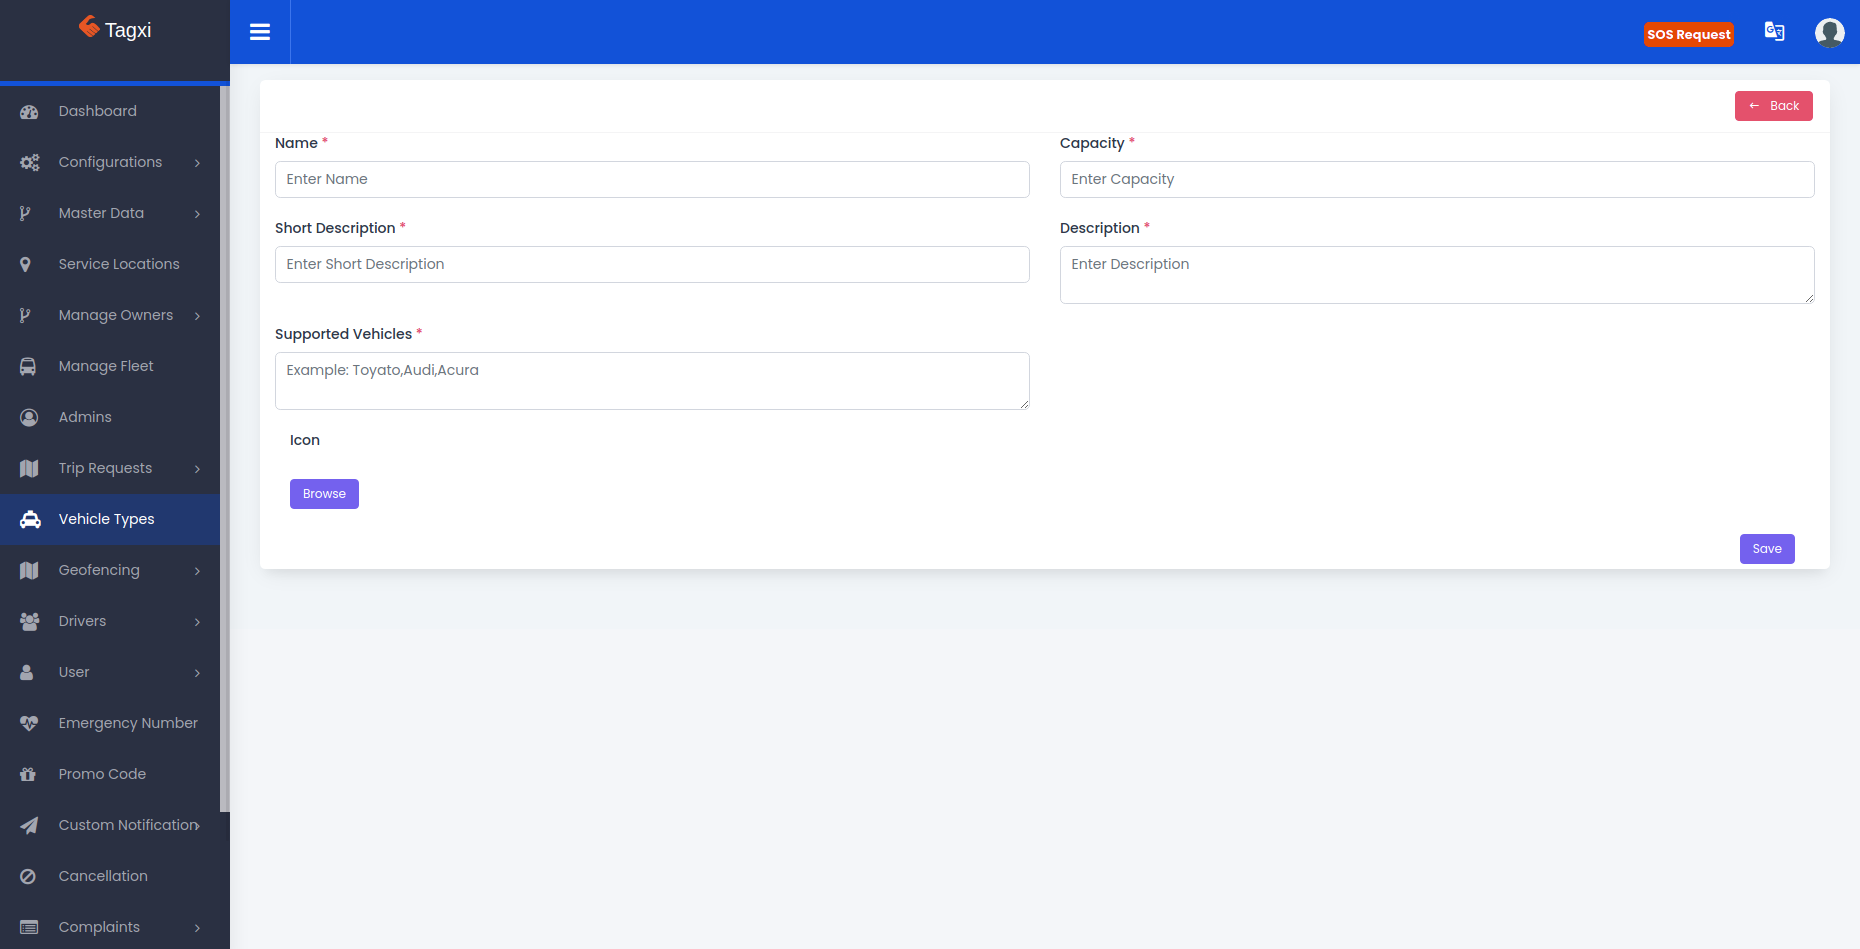
We need to create vehicle types & needed documents as a required configurations
Before Getting in to the Pricing we need to create a Vehicle types for the system. please refer the below image to create a vehicle types.
2. Create Service Location
Service location represents the area of your service. that is where the service is going to launch. you can restrict the users by setting the service lcoation. only the service available area's users could be used our application other users cannot use our application.
You can set unique currency & timzone for each service location. so that you can launch our application world wide.
please refer the following image to create a service location.

3.Geofencing & Pricing
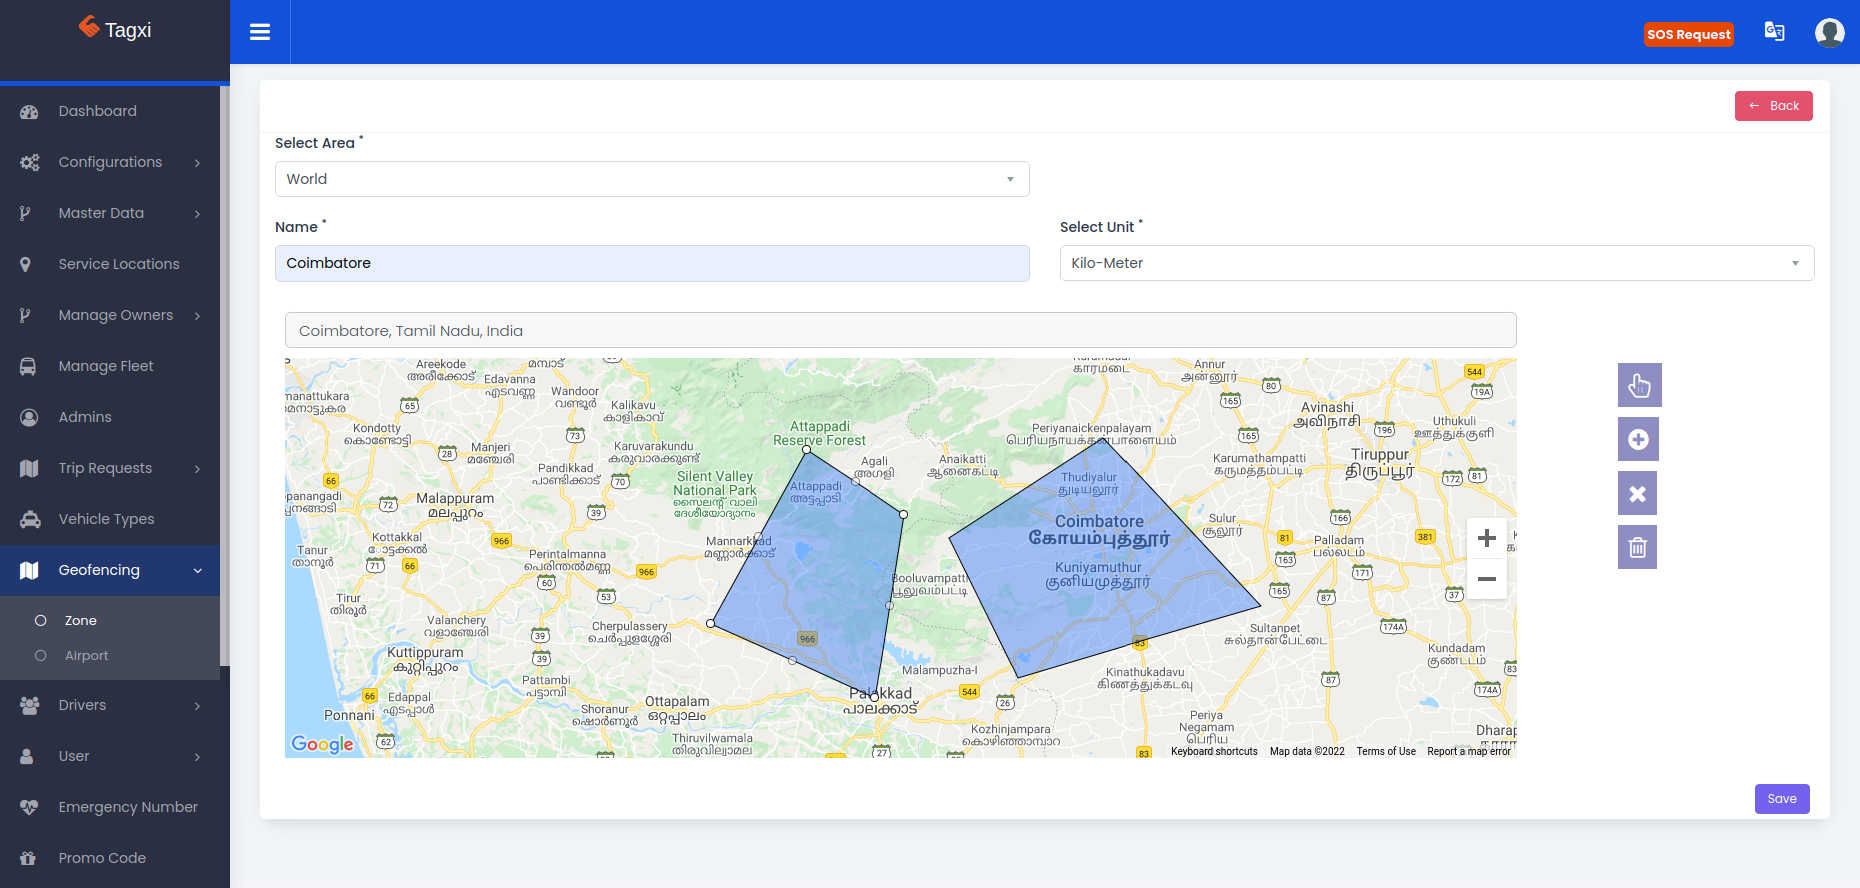
Geofencing which helps to create a zone in service location. you can draw multiple zone as polygon on a map in each service location. only the polygon contains area's could be use our application, other area will resemble that is service not available at this location.
While creating a zone you can set the units for each zone. unit is for the trip requests distance should be calculated as kilometers or miles. you can configure different units for each zone.
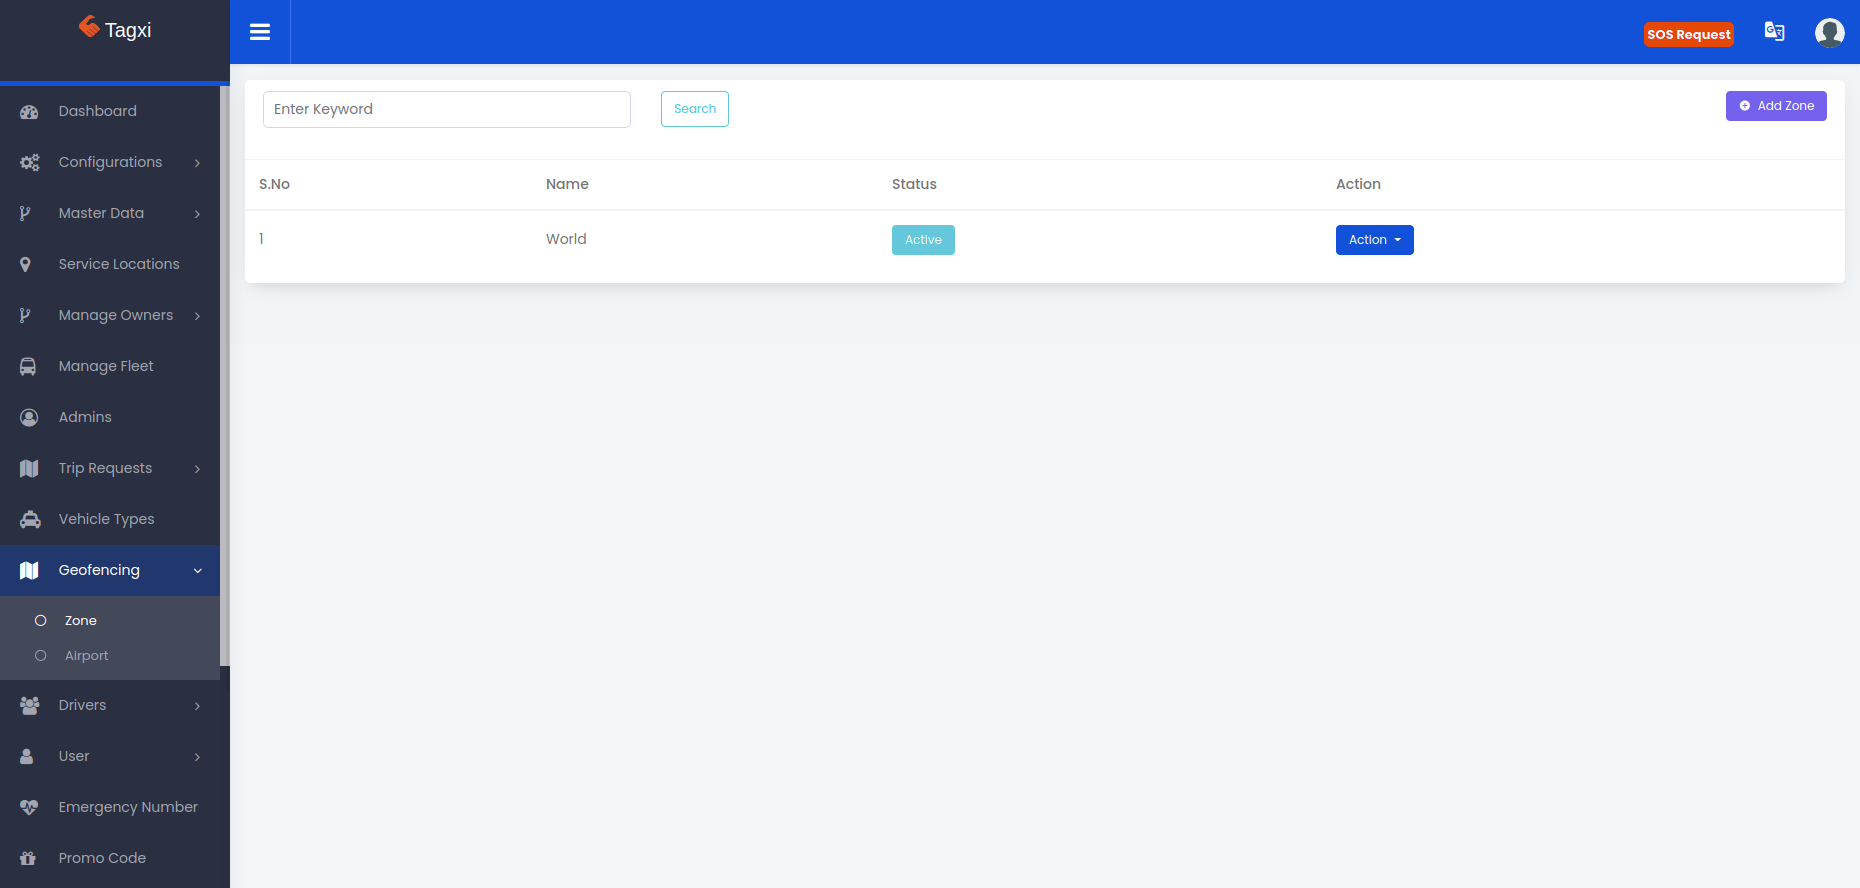
Here we are providing an Edit & zone map view options as well, by using these option you can see the drawn zone and also you can edit the coordinates for each zone at any time.
Please refer the following image to create a zone
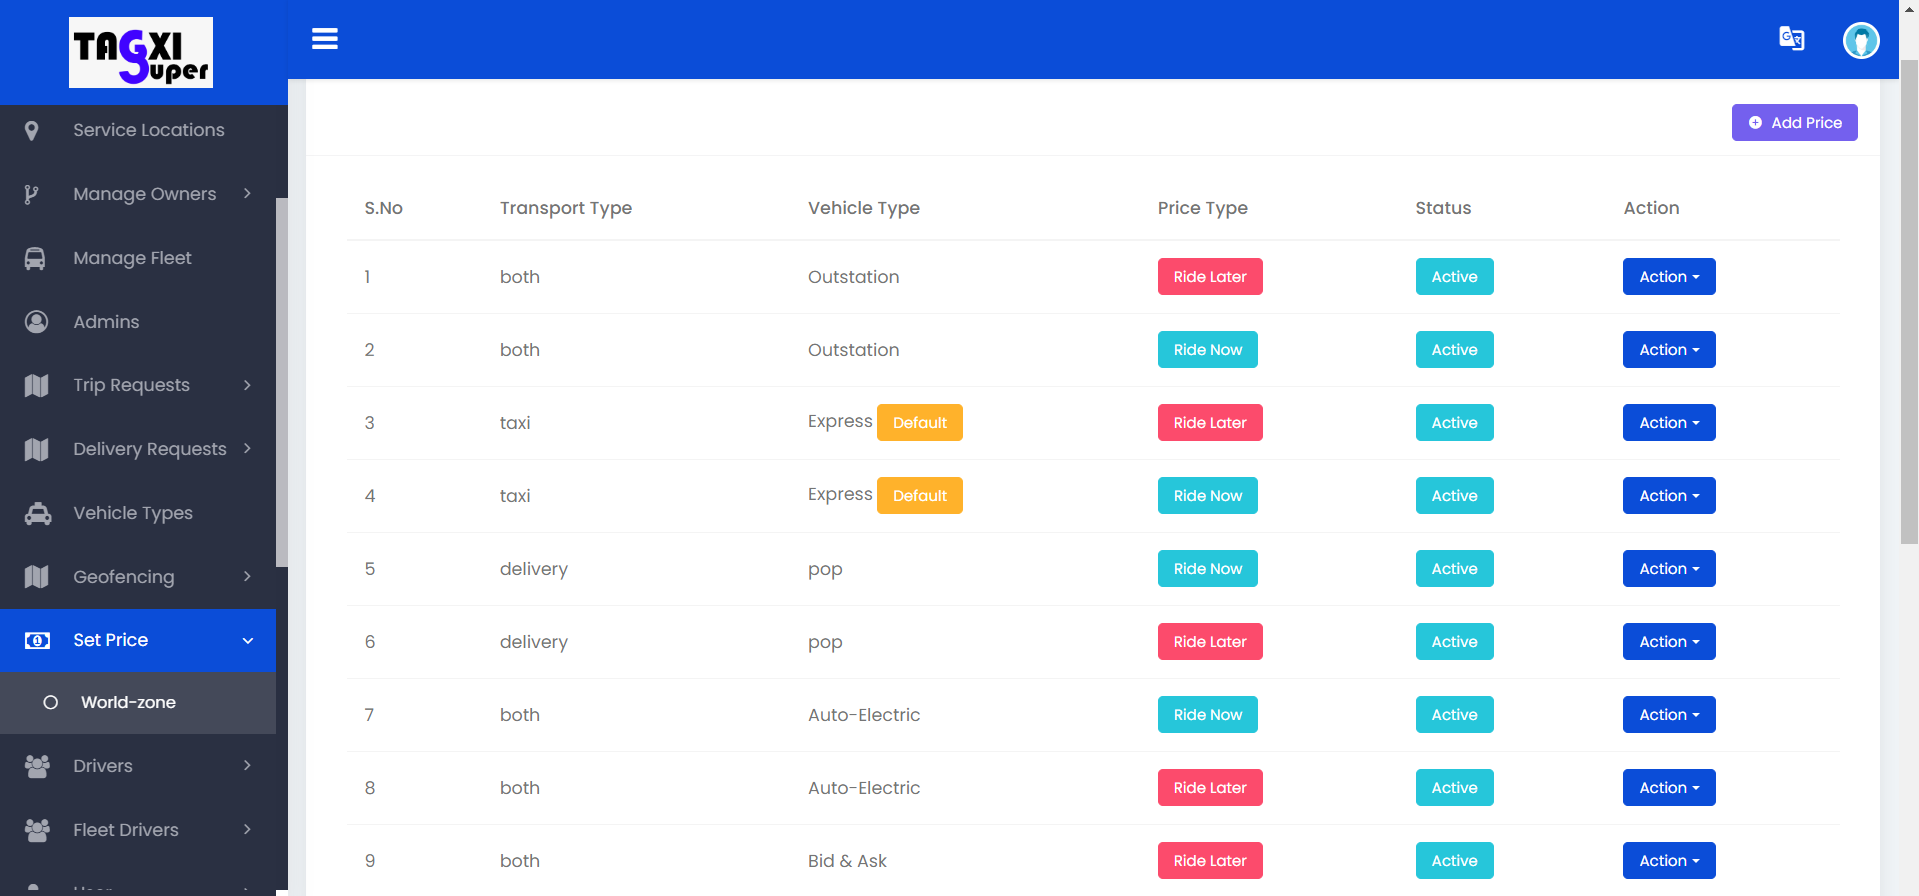
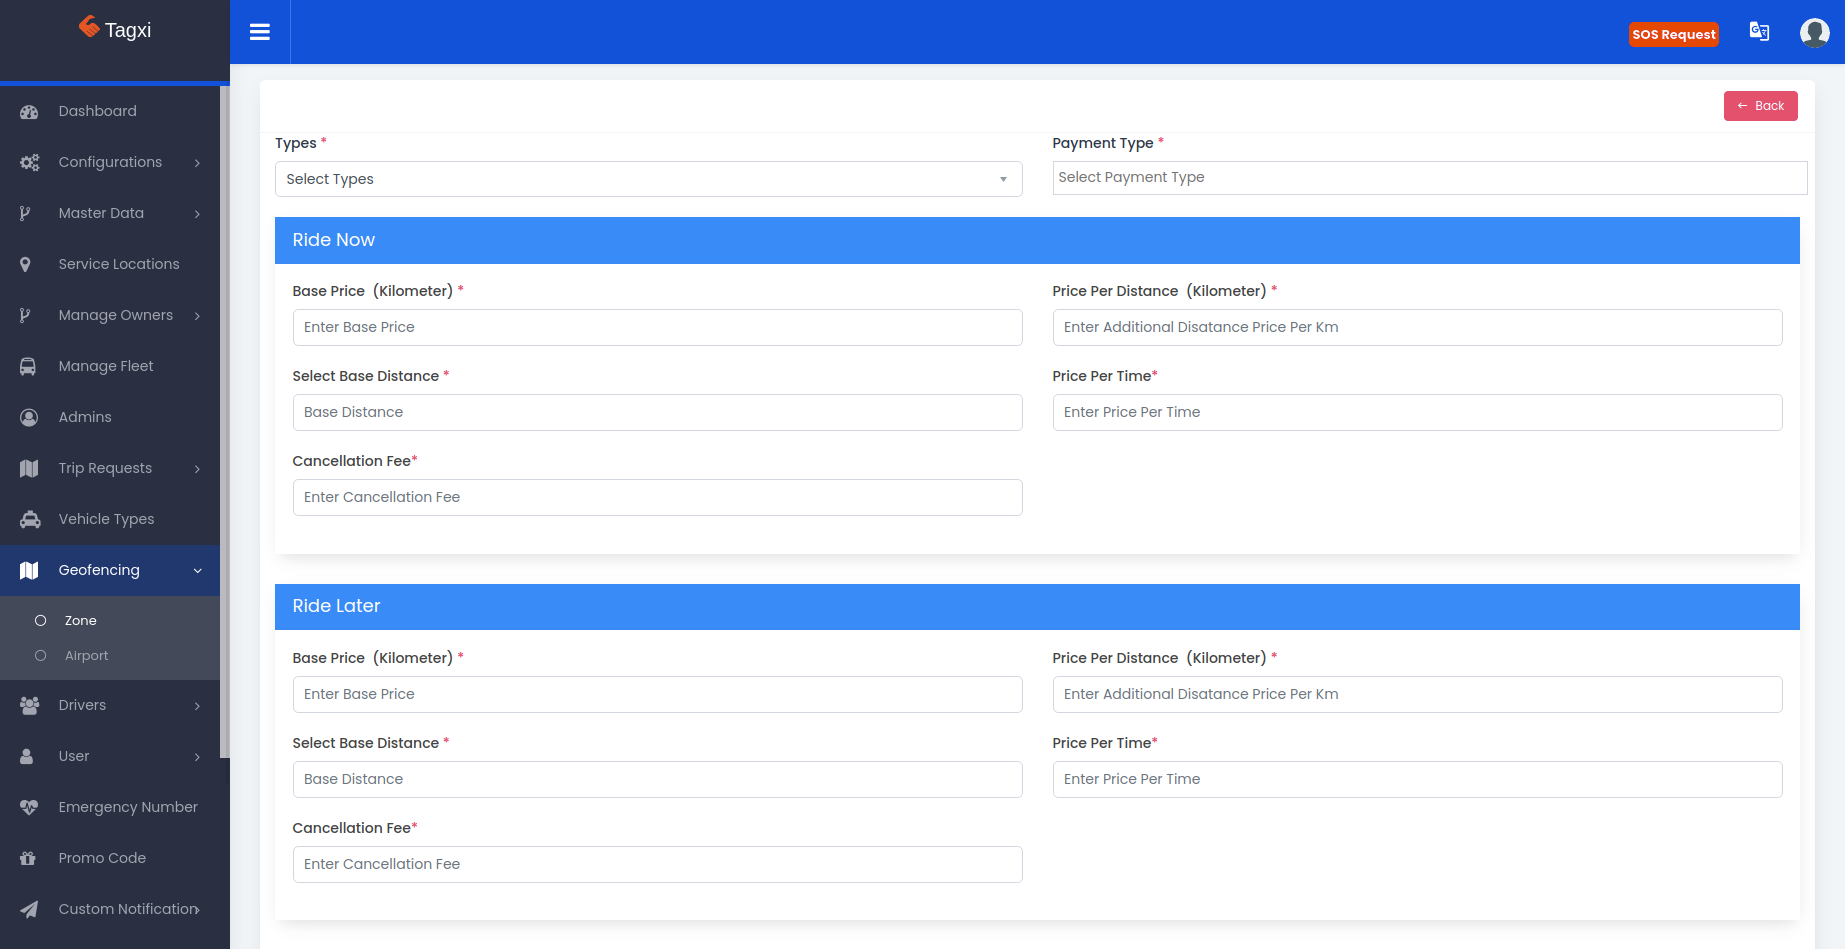
4. Assign Type along with pricing
After createing the vehicle types & zone we need to assign the vehicle types for each zone.
while assign the vehicle type to the particular zone you can also set some configurations like if you want to allow only cash trip in a particular zone you can choose payment types as only cash. you can set three options i.e cash,card,wallet.