Flutter Android Setup
- Introduction
- Setup Instructions
- Change Base Url
- Change Website URL
- Google Map & Cloud Configure
- Change Package Name
- Change Icons
- Change Display Name
- Payment gateway Setup
- Change app version
- Create release keys
- Replace the jks key
- Generate SHA-1
- Google Map Services Setup
- Generate APK
- Generate bundle file
- Final Steps
Introduction
In this article, we are going to set up the TYT App’s initial setup for real-time use cases.
Setup Instructions
-
flutter version for this project is 'Channel stable, 3.38.7.'
-
Dart SDK version for this project is '3.10.7'
-
Android SDK version for this project is '36'
-
Gradle version for this project is 'gradle-9.2.1-all.zip'
-
Java version for this project is 'jdk-17'
-
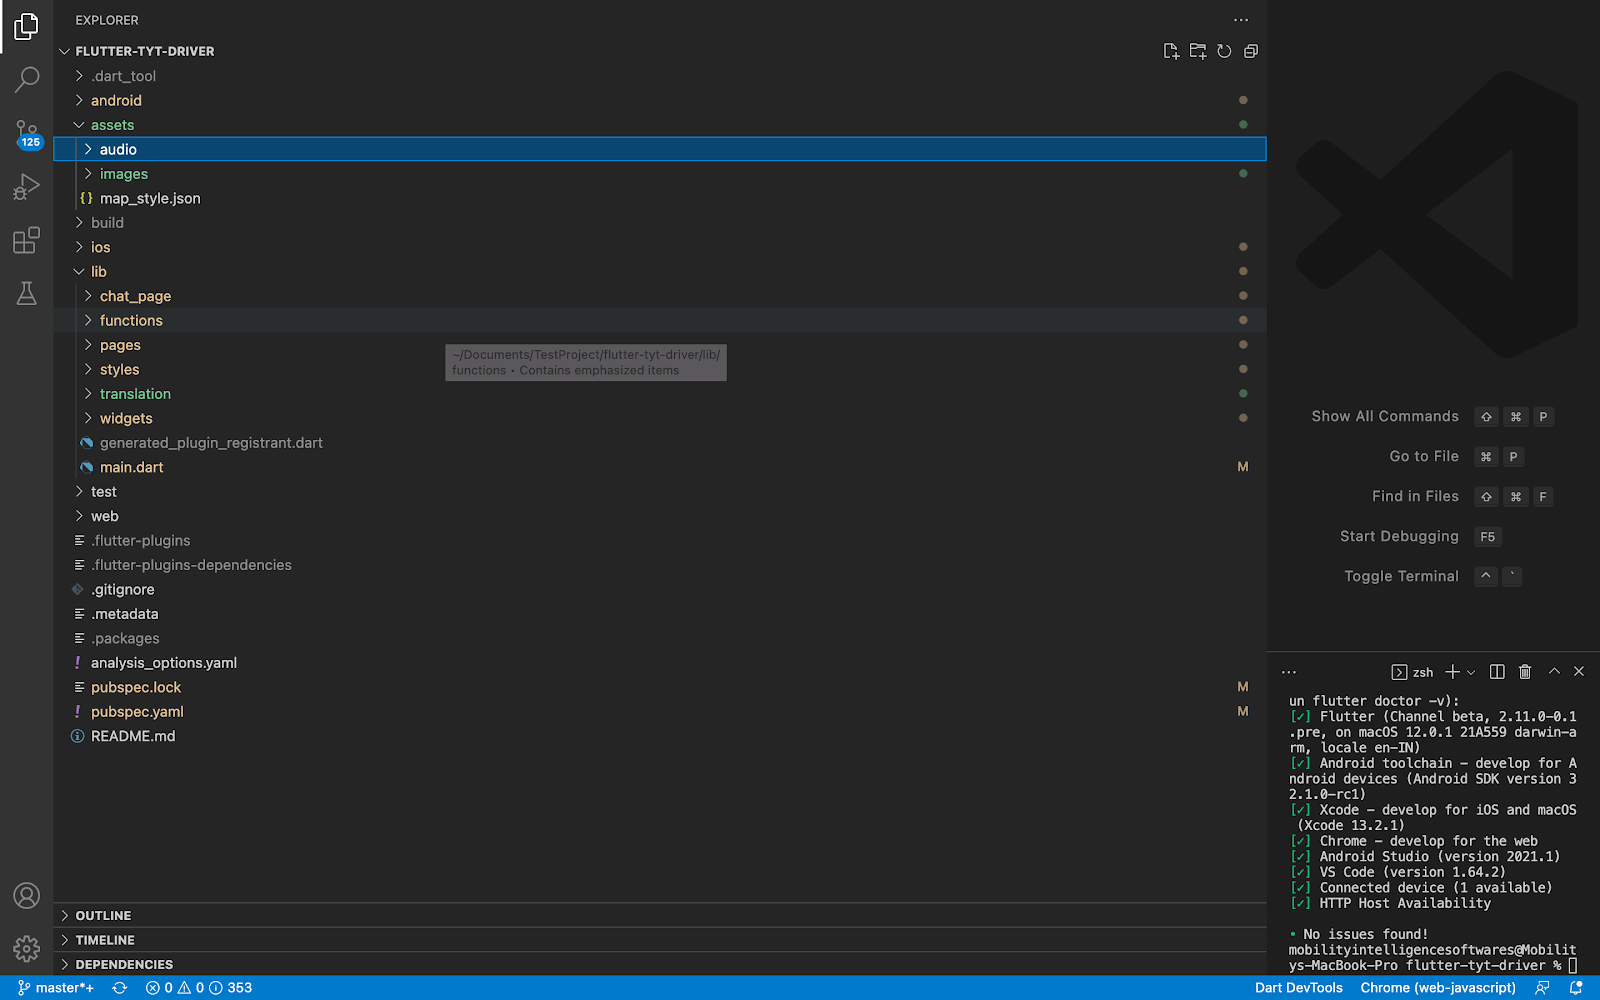
Open your project File the Visual Studio Code which is used to create the project and also it is very powerful.
-
In terminal run command 'flutter pub get'
-
Project structure is given in image below
Major things to do:
Change Base Url
-
Change the BASE_URL Variable Presented in the Constants File.
-
It just updates your server’s primary URL to access all types of API Services From the App to your Server.
-
like this
- Note : File Location : project/lib/functions/functions.dart
-
String url = 'your base url here';
-
Change App Color.
just update the below parameter to change the app color
Note : File Location : project/lib/styles/styles.dart
-
Color buttonColor = const Color(0xffFCB13D);
-
Color loaderColor = const Color(0xffFCB13D);
-
Color theme = const Color(0xffFCB13D);
-
Color buttonTextColorDarkMood = const Color(0xffFFCC00);
-
Color buttonTextColorLightMood = const Color(0xffFFCC00);
-
Color buttonColorDarkMood = const Color(0xff000000);
-
Color buttonColorLightMood = const Color(0xff000000);
-
Change Website URL
-
change website url in given files,
- Note : File Location project/lib/pages/login/agreement.dart
onTap: () {

openBrowser(

'your terms and condition url here');

},

child: Text(

languages[choosenLanguage]['text_terms'],

style: GoogleFonts.roboto(

fontSize: media.width * sixteen,

color: buttonColor),

),- Note : File Location "project/lib/pages/login/agreement.dart"
onTap: () {

openBrowser(

'your privacy policy url here');

},

child: Text(

languages[choosenLanguage]['text_privacy'],

style: GoogleFonts.roboto(

fontSize: media.width * sixteen,

color: buttonColor),

),
- Note : File Location "project/lib/pages/NavigatorPages/support.dart"
SubMenu(
                        onTap: () {
                          openBrowser('privacy policy url');
                        },
Google Map & Cloud Configure
-
Create & configure account for map using Google map & Cloud by following below documents.
-
Google Cloud console link: https://developers.google.com/maps/documentation/android-sdk/cloud-setup
-
firebase setup doc: https://firebase.google.com/docs/android/setup
-
-
After created & enabled the billing from google cloud & map console
- add map api key change the map keys in given locations
- Note : File Location "project/android/app/src/main/AndroidManifest.xml"
<meta-data android:name="com.google.android.geo.API_KEY"

android:value="your maps api key here"/>
- Note : File Location "project/lib/functions/functions.dart"
String mapkey = Platform.isAndroid ? 'android map key' : 'ios map key';
- add android map key with restriction for android package and add ios map key with restriction for ios bundle id
-
We need to create nodes in firebase realtime database, please find the sample json database below or refer firebase setup.
-
call_FB_OTP node is used to configure whether the firebase otp should used or dummy otp should use for our testing purpose
-
Please make sure you have created the nodes mentioned below
- call_FB_OTP
-
Update the rules part with below content
  {
  "rules": {
    "drivers": {
      ".read": true,
      ".write":true,
        ".indexOn":["is_active","g","service_location_id","vehicle_type","l","ownerid"],
      },
    "requests": {
      ".read": true,
      ".write": true,
        ".indexOn":["service_location_id"],
    },
       "SOS": {
      ".read": true,
      ".write": true
    },
       "call_FB_OTP": {
      ".read": true,
      ".write": true
    },
      "driver_android_version": {
      ".read": true,
      ".write": true
    },
      "driver_ios_version": {
      ".read": true,
      ".write": true
    },
      "user_android_version": {
      ".read": true,
      ".write": true
    },
      "user_ios_version": {
      ".read": true,
      ".write": true
    },
      "user_package_name": {
      ".read": true,
      ".write": true
    },
      "user_bundle_id": {
      ".read": true,
      ".write": true
    },
      "driver_package_name": {
      ".read": true,
      ".write": true
    },
      "driver_bundle_id": {
      ".read": true,
      ".write": true
    },
      "request-meta": {
      ".read": true,
      ".write": true,
        ".indexOn":["driver_id","user_id"]
    },
      "bid-meta": {
      ".read": true,
      ".write": true,
        ".indexOn":["driver_id","user_id","g"]
    },
      "owners": {
      ".read": true,
      ".write": true,
        ".indexOn":["driver_id","user_id"]
    },
      "chats": {
      ".read": true,
      ".write": true
    },
   }
 }
Change Package Name
- Download & Paste the google-services.json into the 'project/android/app' folder properly to make proper communication from your App which is a client to FireBase.

- copy the package name from firebase and paste it in the following files
- Note : File Location "project/android/app/build.gradle"
applicationId "package name here"

namespace "package name here"
-
Note : File Location "project/android/app/src/main/res/../../../AndroidManifest.xml"
-
<manifest xmlns:android="http://schemas.android.com/apk/res/android" package="package name">
-
<category android:name="android.intent.category.BROWSABLE" />
-
<data android:scheme="tagxi" android:host="package name" />
-
<package android:name="package name" />
-
-
Note : File Location "project/lib/main.dart"
- AndroidIntent intent = AndroidIntent( action: 'action_view', package: 'package name', // Your app's package name componentName: 'package name.MainActivity', )
- add package name here
val launchIntent = getPackageManager().getLaunchIntentForPackage("package name");- change folder name
if your package name is com.package.android then,
project/android/app/src/main/kotlin/com/something/something/ to project/android/app/src/main/kotlin/com/package/android- change package name for openstreet map in user app
- Note : File Location "project/lib/pages/onTripPage/booking_confirmation.dart" userAgentPackageName: "com.example.app"
- Note : File Location "project/lib/pages/onTripPage/drop_loc_select.dart" userAgentPackageName: "com.example.app"
- Note : File Location "project/lib/pages/onTripPage/edit_drop_location.dart" userAgentPackageName: "com.example.app"
- Note : File Location "project/lib/pages/onTripPage/map_page.dart" userAgentPackageName: "com.example.app"
- Note : File Location "project/lib/pages/onTripPage/pick_loc_select.dart" userAgentPackageName: "com.example.app"
- change package name for openstreet map in driver app
- Note : File Location "project/lib/pages/NavigatorPages/myroutebookings.dart" userAgentPackageName: "com.example.app"
- Note : File Location "project/lib/pages/onTripPage/droplocation.dart" userAgentPackageName: "com.example.app"
- Note : File Location "project/lib/pages/onTripPage/map_page.dart" userAgentPackageName: "com.example.app"
Change Icons
-
replace icons images in following folders in given name
-
project/assets/images/ - logo.png
-
project/assets/images/ - icon.png (circle image 500x500, only for driver)
-
project/android/app/src/main/res/mipmap-hdpi - ic_launcher.png (72x72)
-
project/android/app/src/main/res/mipmap-mdpi - ic_launcher.png (48x48)
-
project/android/app/src/main/res/mipmap-xhdpi - ic_launcher.png (96x96)
-
project/android/app/src/main/res/mipmap-xxhdpi - ic_launcher.png (144x144)
-
project/android/app/src/main/res/mipmap-xxxhdpi - ic_launcher.png (192x192)
-
project/android/app/src/main/res/drawable/ - logo.png
-
Change Display Name
- change app display name in file,
-
Note : File Location "project/android/app/src/main/AndroidManifest.xml"
android:label="product name" project/lib/main.dart title: 'product name',- Note : File Location "project/lib/functions/functions.dart - (only in driver)"
product name will continue- Note : File Location "project/lib/pages/login/agreement.dart
replaceAll('5555', 'Product Name')
Change app version
- change app version
Note : File Location "project/pubsec.yaml"
version: 1.0.2+3
Create release keys
- create release keys by running command in terminal
note: change anyname with any specific name you like,
- keytool -genkey -v -keystore ~/[name].jks -keyalg RSA -keysize 2048 -validity 10000 -alias [your_alias_name]-storetype JKS
- after running this command give the data asked in the terminal. after that it will save the jks file and display the location
Replace the jks key
- replace the jks key details in file,
Note : File Location "project/android/key.properties as given below"
storePassword=password you entered while creating jks file

keyPassword=password you entered while creating jks file

keyAlias=alias name you given in the command for creating jks file

storeFile=jks file name with the location like ../../../jks
Generate SHA-1
-
Generate SHA-1 and SHA-256 keys from the project
-
you will be able to get these keys in two ways these are
-
in terminal go to folder 'project/android/' and run the command './gradlew signinReport' then you will get debug and release SHA-1 and SHA-256
-
Run the below command in the terminal to get SHA keys
- Key tool -genkey -v -keystore release.keystore -alias [your_alias_name] -keyalg RSA -keysize 2048 -validity 10000
-
-
Finally copy that debug and release keys and paste those in Firebase where
Click Settings icon (presented right on project overview ) -> project settings -> Your App section -> SHA certificate fingerprints click add button and paste & Submit.
Google Map Services Setup
- Google Map Services Setup
-
Enable below services in cloud console
-
Places API - which helps to get address while typing keys from the app
-
Maps SDK For Android & Maps SDK For iOS
-
Google Sheets API - For translation sheets
-
Android Device Verification - For Identify the App name to append in OTP from Firebase
-
Geolocation APIs like distance matrix, geocoding, geolocations, Maps JavaScript, Maps static,Routes API,Places New API, Places API.
-
Generate APK
- to download apk file run "flutter build apk --release" in terminal from project location, and you will get apk file in folder - project/build/app/outputs/apk/release/app-release.apk
Generate bundle file
- to download app bundle file run "flutter build appbundle --release" in terminal from project location, and you will get app bundle file in folder - project/build/app/outputs/bundle/release/app-release.aab
Final Steps
- after uploading app in playstore, then you will get a sha1 key and sha256 key from playstore, add those keys in your firebase project as
Click Settings icon (presented right on project overview ) -> project settings -> Your App section -> SHA certificate fingerprints click add button and paste & Submit.